
Mobile application are becoming popular nowadays. According to Statista, the mobile application downloads worldwide is 218 billions which is almost 8- billions more than that of 2016. There are nearly 3.15 million mobile apps in google playstore and 2.09 million in apple app store. Most of people find mobile convenient than that of laptops. The number of mobile users worldwide has exceeded three billion, with several hundred million more expected in the coming years.
To make android application you have three choice. First one is convert websites into mobile application which I don’t recommend to you at all. When I was in college nobody told me that I was doing wrong. I first developed my application in web and later I tried to convert that web app into mobile application which is kind of weird right. You can find plenty of websites on internet that will convert your web application into mobile application. It will work fine in your devices. Later, I came to know that those developed application is only showing WebView in mobile application. These application are not accepted by google play store and apple store. You will get a strike for that. I have attached my strike in the image below.
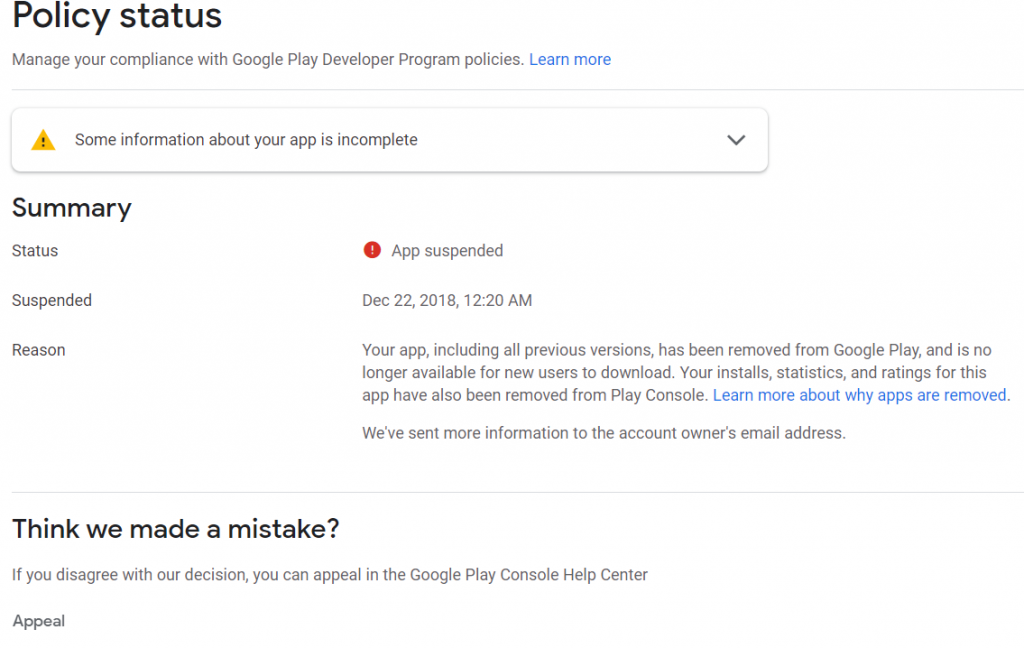
I got suspended for that reason only. So I don’t recommend you to just show the web view of website that you have built.
Later only I came to know about api and database stuff.
Second type of mobile application is to build mobile app natively by using java as a programming language. We are going to talk about native mobile app development using java. To develop mobile application, you must have a Ide like intellige or android studio. We are going to use android studio for this project.
May be this is your first mobile app ever don’t worry, I will try to explain each and every concept of application development.
First you have to download android studio.
To download android studio, head over to google and type “download android studio” and the first result appear will lead you to the download page.
It will take some time to download. After downloading install the android studio like other ide that we have installed before.
After running android studio, you will see the page where you have to select create new project.
After that, you will be redirected to project template.
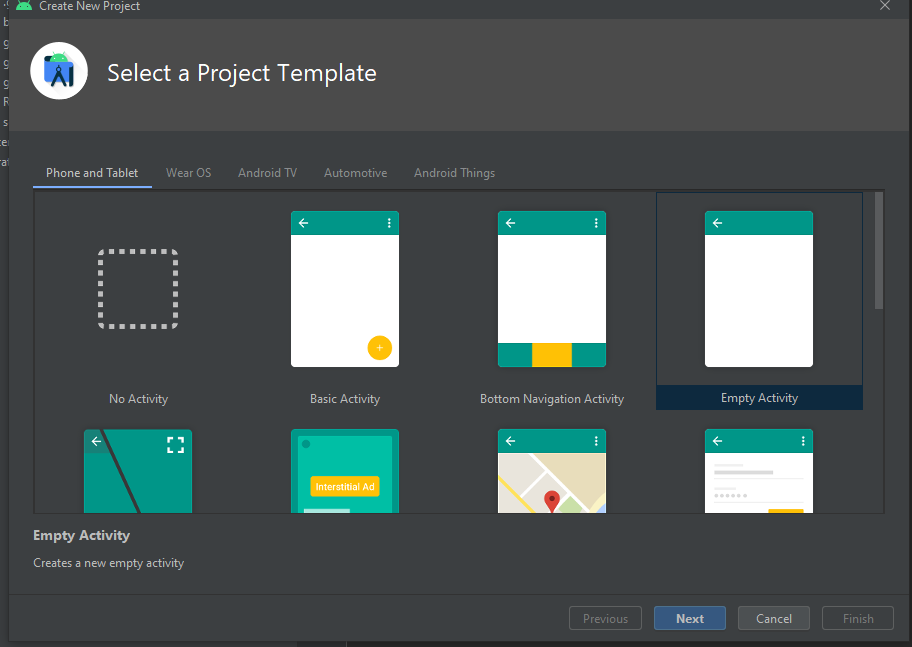
Here you have to select for phone and tablet and you have to select Empty Activity inside phone and tablet option.
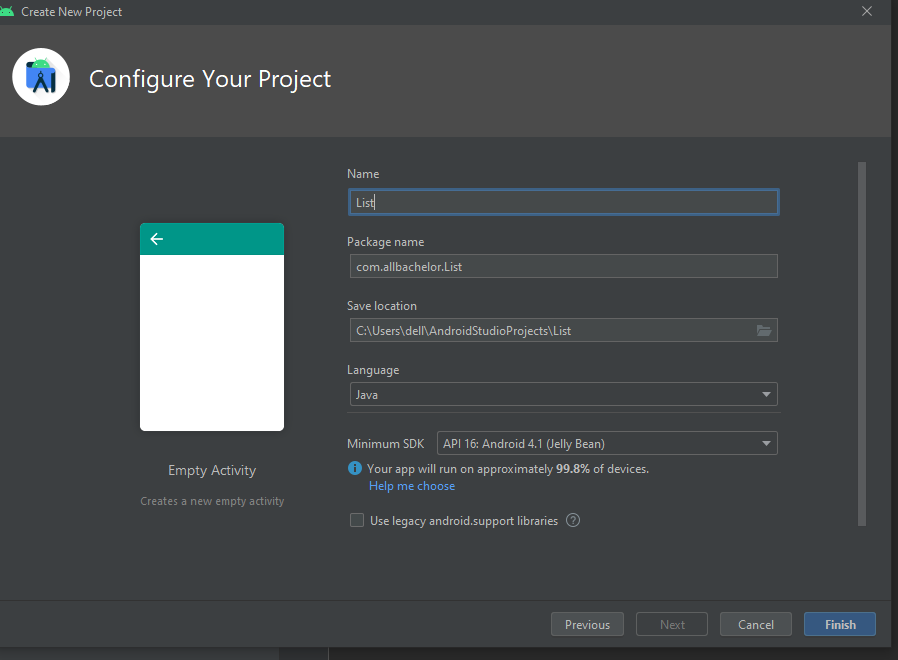
After clicking Empty Activity, you will be redirected to another page where you have to select the name, package name and location of the mobile app. The screen will look like this.
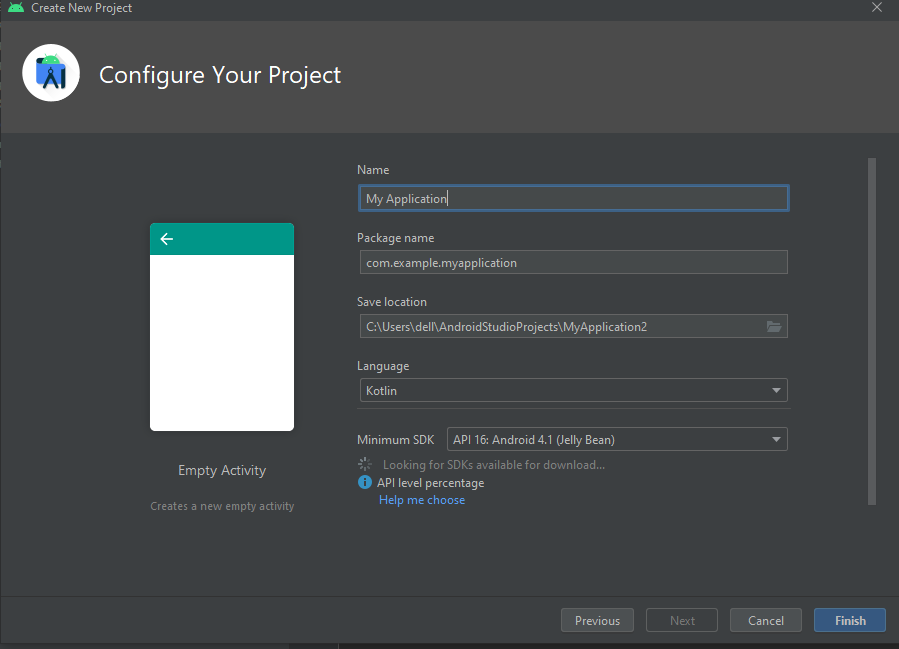
Here you have to write the name of the application that you want to develop and package name for your application. The package name must be unique. To make it unique, we write the package name according to our web URL. If my website URL is www.allbachelor.com, the package name is written as com.allbachelor.projectname. If you don’t have website you can write your YouTube URL in revers or your Facebook Url in reverse form. Make sure to make it unique from others.
Then you have to select the language as java as we are developing mobile application in java.
The final configuration looks like this.
Then after clicking finish, you will be redirected to the java file named as MainActivity.java.
The java file looks like this.
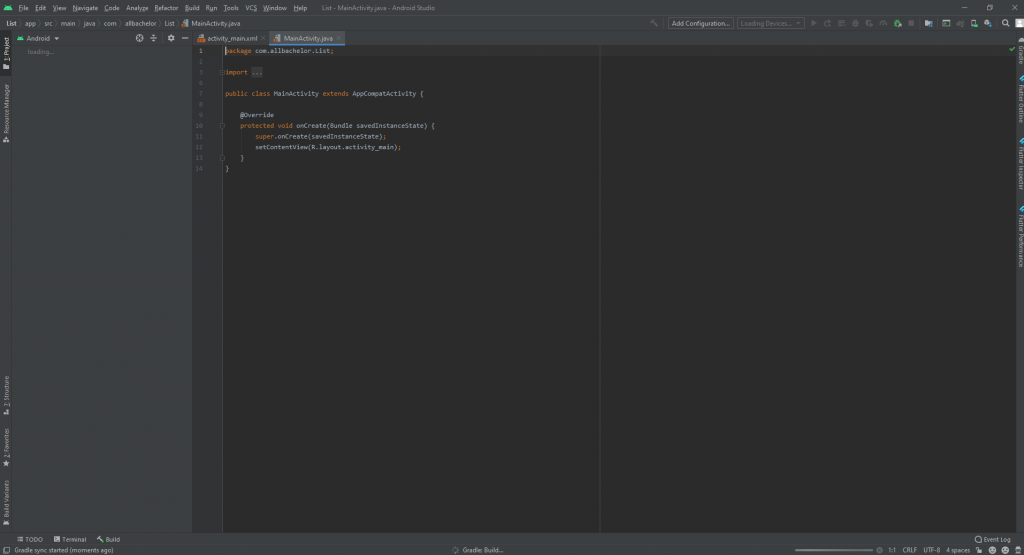
The MainActivity is the main java file. Dont change any of these. You will see that MainActivity is extending AppCompactActivity meaning that AppCompact Activity is the parent class activity of child class MainActivity.java. We dont have to define AppCompactActivity, we only have to import that java class file.
There is no any main method here. So we dont have to write: public static void main(String[] args) here. We have android lifecycle here. We will discuss that topic in next blog.
In above code we have created a method named onCreate and one layout is attached to that java file.
Layout is nothing but the UI part of the application which is written in xml language. Xml is the similar language like html in web. We use html in web development, here we have to define xml file for User interface part of android application.
Till now we have done nothing to the code and added nothing. We understood the basic concept of android app development.
Now we will add the code of java to our program. We will add the java code of list here.
If you have remembered we define list just like this in java.
ArrayList<String> array = new ArrayList();
array.add("ram");
array.add("shyam");
After adding above code, the Mainactivity file looks like this.
package com.allbachelor.list;

import androidx.appcompat.app.AppCompatActivity;

import android.os.Bundle;

import java.util.ArrayList;

public class MainActivity extends AppCompatActivity {

    @Override
    protected void onCreate(Bundle savedInstanceState) {
        super.onCreate(savedInstanceState);
        setContentView(R.layout.activity_main);

        ArrayList<String> array = new ArrayList();
        array.add("ram");
        array.add("shyam");
    }
}
We have defined Array list and put some value inside the list.
Now we have to add some code to xml file to show to the user.
For this we will go to res folder. Inside res folder, we have to click on layout folder to define the ui of the application.
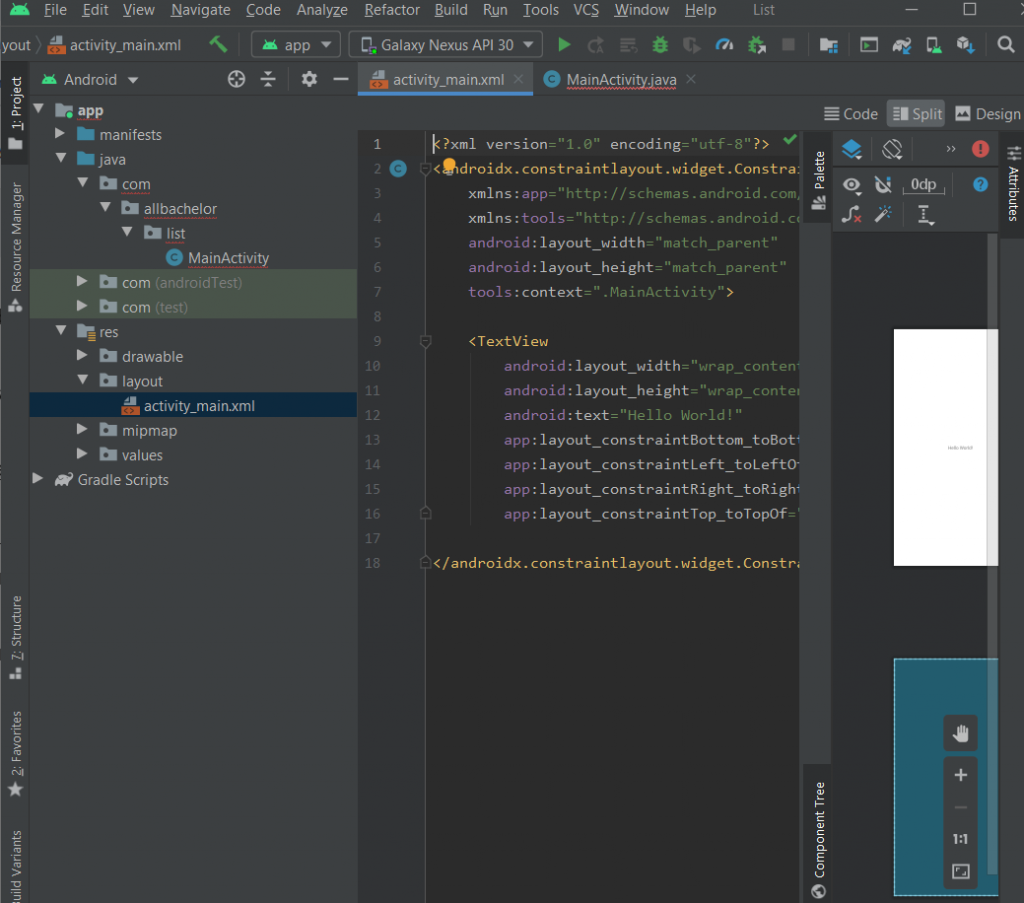
In our xml file, only “hello world” is written which show us the hello world text in screen.
But we want to show the list to the user. So, we have to define the ListView.
To define listview just type <ListView , the suggestion will pop up and set the width to match parent and height to match parent. Now you have to give the unique id to this list view so that we can call from java file. In this example I will name as listView. You can also add other design to the list view. But for this, I will only add the background color as blue.
<?xml version="1.0" encoding="utf-8"?>
<androidx.constraintlayout.widget.ConstraintLayout xmlns:android="http://schemas.android.com/apk/res/android"
    xmlns:app="http://schemas.android.com/apk/res-auto"
    xmlns:tools="http://schemas.android.com/tools"
    android:layout_width="match_parent"
    android:layout_height="match_parent"
    tools:context=".MainActivity">

   <ListView
       android:layout_width="match_parent"
       android:layout_height="match_parent"
       android:id="@+id/listView"
       android:background="#00008B"
       ></ListView>

</androidx.constraintlayout.widget.ConstraintLayout>
Then to attach Listview from java file to xml file, we have to import ListView class which is provided to us.
ListView listView = findViewById(R.id.listView);
For simplicity, we can also do like this
ListView listView;
listView = findViewById(R.id.listView);
make sure that the id name is same to the xml file.
Now the code look like this
package com.allbachelor.list;

import androidx.appcompat.app.AppCompatActivity;

import android.os.Bundle;
import android.widget.ListView;

import java.util.ArrayList;

public class MainActivity extends AppCompatActivity {

    @Override
    protected void onCreate(Bundle savedInstanceState) {
        super.onCreate(savedInstanceState);
        ListView listView;
        setContentView(R.layout.activity_main);
         listView = findViewById(R.id.listView);
        ArrayList<String> array = new ArrayList();
        array.add("ram");
        array.add("shyam");
    }
}
After this we have to define the ArrayAdapter to link the layout for the list view item. We have to use new keyword and this keyword. So, if you forgot what these keyword in java, its time to read java again.
ArrayAdapter<String> arrayAdapter = new ArrayAdapter<>(this, R.layout.listitem, array);For this code to run, we have to define a layout named listitem. You can give any name instead of listitem. For simplicity, I am using listitem.
To create new layout file,
Click on android and click on new and click on android layout file as shown in figure below.
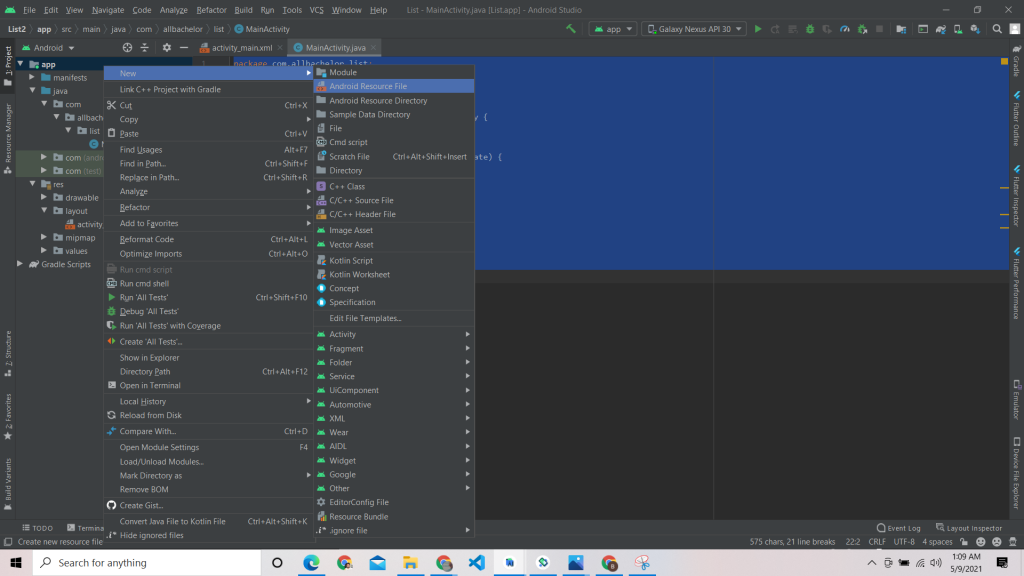
After that name the layout name and dont forget to change the resource type to layout
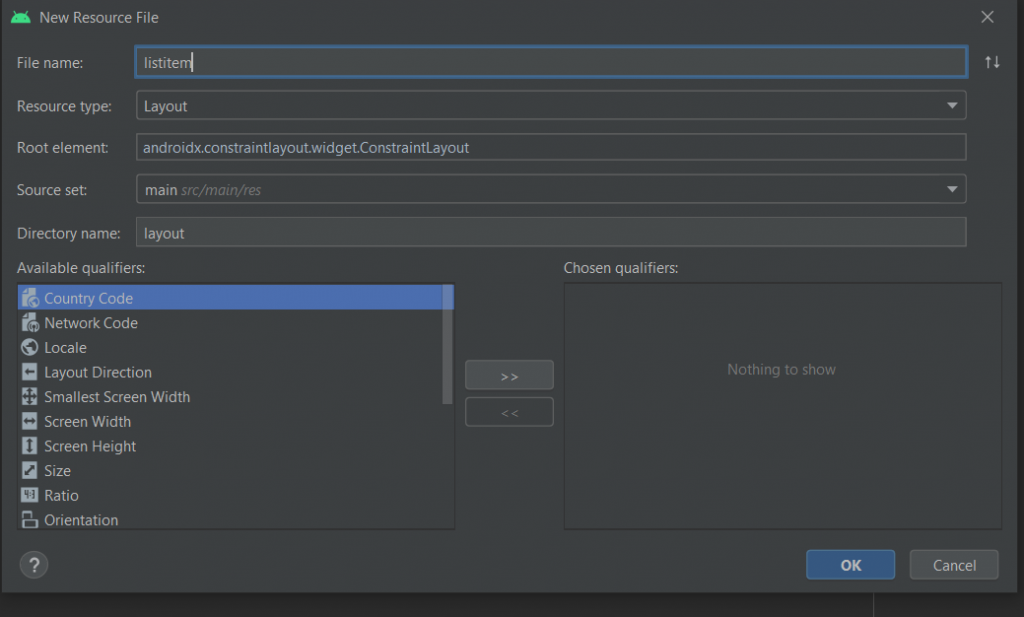
After this, new layout will be created where we will define the layout for list item. Dont get confused, first one is for ListView and other component of mainactivity.
You dont have to change all the code there. Only replace ConstraintLayout with TextView.
The code will look like this:
<?xml version="1.0" encoding="utf-8"?>
<TextView
xmlns:android="http://schemas.android.com/apk/res/android" android:layout_width="match_parent"
android:layout_height="match_parent">
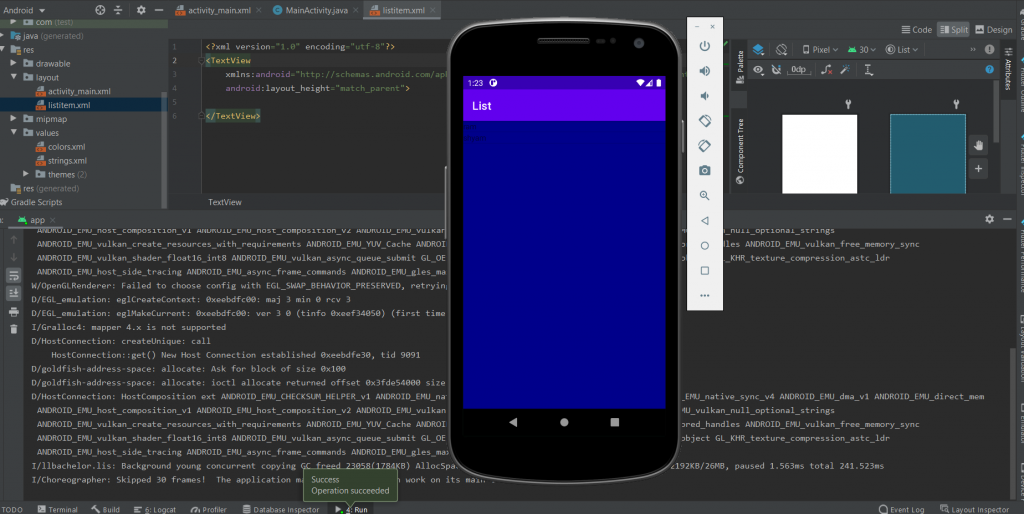
</TextView>At last we have to add the abovee adapter code to main activity as follows and we have to set the adapter to list view.
the final code will look like this.
package com.allbachelor.list;

import androidx.appcompat.app.AppCompatActivity;

import android.os.Bundle;
import android.widget.ArrayAdapter;
import android.widget.ListView;

import java.util.ArrayList;

public class MainActivity extends AppCompatActivity {

    @Override
    protected void onCreate(Bundle savedInstanceState) {
        super.onCreate(savedInstanceState);
        ListView listView;
        setContentView(R.layout.activity_main);
         listView = findViewById(R.id.listView);
        ArrayList<String> array = new ArrayList();
        array.add("ram");
        array.add("shyam");
        ArrayAdapter<String> arrayAdapter = new ArrayAdapter<>(this, R.layout.listitem, array);
        listView.setAdapter(arrayAdapter);
    }
}
After running our program, our app look like this.
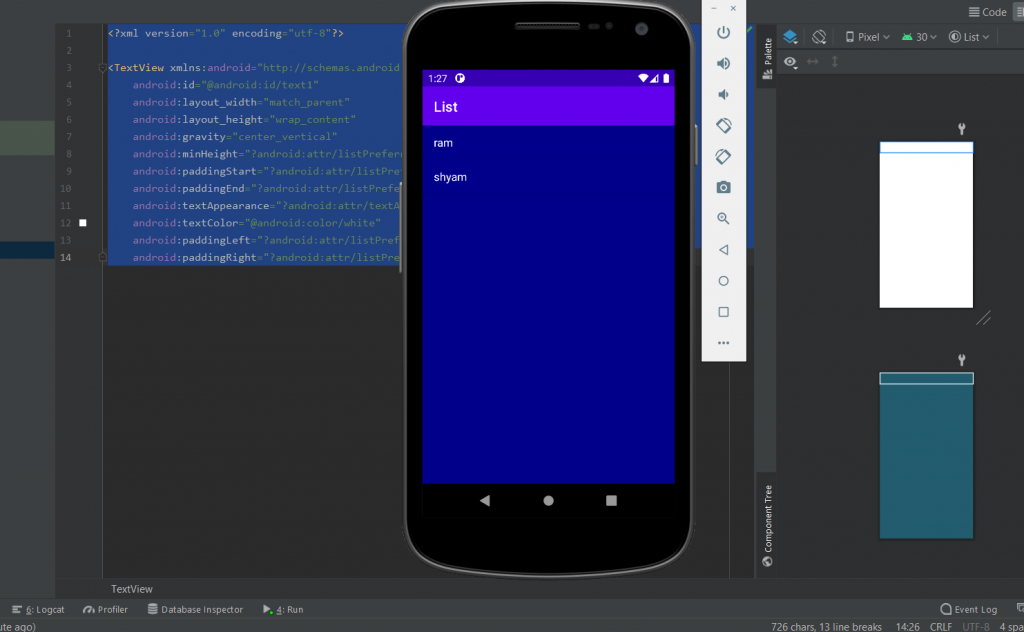
Inorder to change the UI, we have to change the xml file. To look listItem better I have added some color, height and padding to the listitem.xml file.
<?xml version="1.0" encoding="utf-8"?>

<TextView xmlns:android="http://schemas.android.com/apk/res/android"
    android:id="@android:id/text1"
    android:layout_width="match_parent"
    android:layout_height="wrap_content"
    android:gravity="center_vertical"
    android:minHeight="?android:attr/listPreferredItemHeightSmall"
    android:paddingStart="?android:attr/listPreferredItemPaddingStart"
    android:paddingEnd="?android:attr/listPreferredItemPaddingEnd"
    android:textAppearance="?android:attr/textAppearanceListItemSmall"
    android:textColor="@android:color/white"
    android:paddingLeft="?android:attr/listPreferredItemPaddingLeft"
    android:paddingRight="?android:attr/listPreferredItemPaddingRight" />
The app look like this:
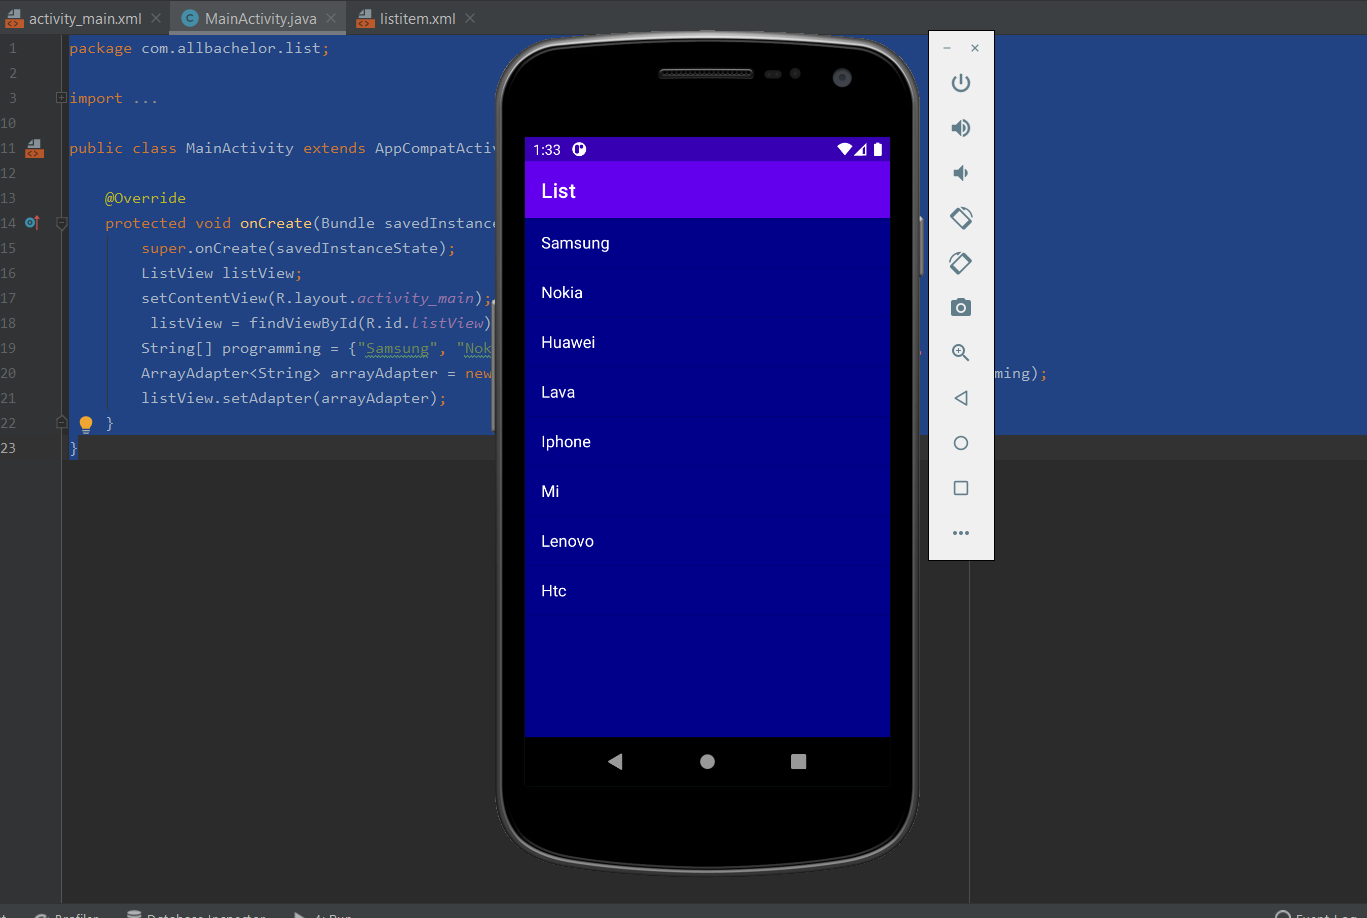
You can also use other methods to add the list to the java file. Its up to you to change the java file and xml file.
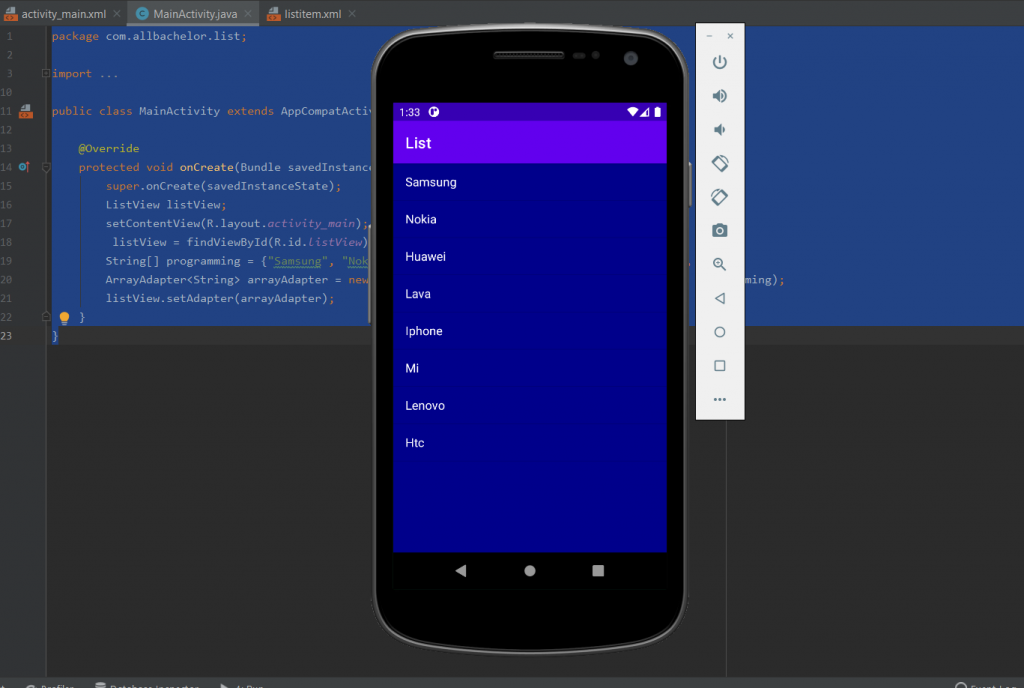
You can also add the string array instead of arraylist as:
String[] programming = {"Samsung", "Nokia", "Huawei", "Lava", "Iphone", "Mi", "Lenovo", "Htc"};
Don’t forget to change the array to programming in arrayadapter. The final code will look like this:
package com.allbachelor.list;

import androidx.appcompat.app.AppCompatActivity;

import android.os.Bundle;
import android.widget.ArrayAdapter;
import android.widget.ListView;

import java.util.ArrayList;

public class MainActivity extends AppCompatActivity {

    @Override
    protected void onCreate(Bundle savedInstanceState) {
        super.onCreate(savedInstanceState);
        ListView listView;
        setContentView(R.layout.activity_main);
         listView = findViewById(R.id.listView);
        String[] programming = {"Samsung", "Nokia", "Huawei", "Lava", "Iphone", "Mi", "Lenovo", "Htc"};
        ArrayAdapter<String> arrayAdapter = new ArrayAdapter<>(this, R.layout.listitem, programming);
        listView.setAdapter(arrayAdapter);
    }
}
If you are interested in this type of blog. Please let me know. If you are interested I will make these list clickable in next blog. Comment down below how many of you have read so far. This is for my motivation. Your comment will really motivate me.
The code is available in github: https://github.com/dingavinga/listviewapp-simple–

Keep uploading such type of content, sir. I really enjoy reading and learning such thing.
thanks for your comment 🙂
Great sir !!
Hoping for more blogs
Thanks for your comment. I will surely write other blogs
Thank you sir. Helped a lot in creating my first ever very simple android app