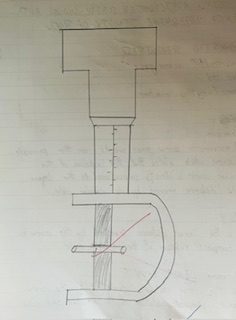
APPARTUS REQUIRED
1 A micrometer screw gauge
2) Glass rod
3) Balance / weighing machine
THEROY
Principle 1
A micrometer screw gauge works on the principle of screw which states that the rotation of the circular scale is directly proportional to the linear scale / distance moved by its circular scale.
PITCH
It is the linear distance travelled by screw one complete rotation of the circular scale
LEAST COUNT
It is the linear data travelled by the screw in one complete rotation of the circular one scale.
L.C = Pitch/ Total no of circular division
P/N
If d is diameter, l is the length of the glass rod and m is the mass of the glass rod then, the cross sectional
area of glass rod is
A = πd²/4
And its density is given by.
P= m/A X L

OBSERVATION
1) For the least count
value of 10 main scale division = 10mm
Value of 1 main scale division = 1 mm
No. of circular scale division = 100
In 5 complete rotation, screw advances through 5mm main scale division.
In 1 complete rotation, screw advances through 1msd
Pitch: Linear distance traveled by the screw in 1 complete rotation.
P = 1 m.s.d. = 1mm.
L.C.= P/N = 0.01mm
2) For zero error
Zero correction=
Length of the rod = 1.55
Mass of the rod(m) = 1.02gm
Table of measurement of diameter
| No. of obs. | M.S.R.(Xmm) | C.S.R.(Ymm) | Value of C.S.R[YxLC] | Total X+[XxLC] | Mean diameter | Corrector I error |
| 1. | 5 | 0 | 0 | 5 | ||
| 2. | 5 | 90 | 0.9 | 5.90 | ||
| 3. | 5 | 85 | 0.85 | 5.85 | ||
| 4. | 5 | 86 | 0.86 | 5.86 | 5.33 | |
| 5. | 5 | 86 | 0.86 | 5.86 | 5.783 | |
| 6. | 5 | 87 | 0.87 | 5.87 | ||
| 7. | 5 | 88 | 0.88 | 5.88 | ||
| 8. | 5 | 88 | 0.88 | 5.88 | ||
| 9. | 5 | 86 | 0.86 | 5.86 | ||
| 10. | 5 | 87 | 0.87 | 5.87 |
Calculations
length of the rod.(1) = 1.55
Mean diameter (d ) = 5.783m = 0.5783cm
Cross sectional area
A = πd2 / 4
= 22 (5.75) ² / 4
= 0.2600 47 cm
Mass of rod = 0.63g
Density p = m / AxL
= 0.69 / 0.260047 × 1.55
= 1.711849359 g/cm3
Percentage error
Standard value of density of glass, pg = 2.5 g/cm3
Observed value of density of glass, po= 1.711849
Percentage error = |Pg – Po / Pg | x 100%
= |2.5-1.504 / 2.5|x 100%
= 3 %
Percentage error = |Pg – Po / Pg| x 100%
= | 2.5 – 1.711849 / 2.5 | x 100%
= 39.84 %
RESULTS
The density of material of given gas was found to be 1.504% 1.711849 g/cm ³ from the experiment.
CONCLUSION
Diameter of the given glass rod is measured by using a micrometer screw gauge and the density is determined.
PRECAUTIONS
1. The glass rod should be placed between two studs. properly.
2. The zero error should be determined carefully.
3. The screw should always be turned in the same direction to avoid backlash error.
